Embedded Rust diary - part 1
For some random nights in the past few months, I've been poking at the absolutely fantastic Teensy 4.0 embedded system-on-a-chip board with some Rust. It has some thrilling specs - embedded doesn't have to be slow and constrained!
- ARM Cortex-M7 at 600 MHz
- 1024k RAM
- 2048k Flash
- FPU with 64 bit "double" and 32 bit "float" hardware-accelerated math
Below are some notes I've written down about my experience, as a beginner to the embedded side of Rust. This text is kind of a "slice of life". It doesn't have much of a "point", other than to reflect a bit on how many tiny things you bump into when doing software development, especially in an area you're less familiar with. I felt like these tiny bumps are not usually mentioned in online texts, and decided to share.
2020-03-15
Grab a Teensy 4.0. Cut the pin headers to length. Place headers on breadboard, and the Teensy on top. Solder the corners, then the rest of the pins. Find a micro-usb cable. Make sure it isn't one of those charging-only cables without data pins connected.
Start running some shell commands
# Add the rust arm target
rustup target add thumbv7em-none-eabihf

# Clone the Teensy repository
git clone https://github.com/mciantyre/teensy4-rs

# Try running the test
cd teensy4-rs
./hardware-test.sh led
error occurred: Failed to find tool. Is `arm-none-eabi-gcc` installed?
Right, more dependencies and path config stuff to enjoy, bleh. Docker to the rescue.
# Build the builder image
cd docker; docker build -t rust_teensy .; cd ..
# Build the led example with the builder docker
docker run -it --rm -v $PWD:/build rust_teensy led;
# Get greeted by an error:
./hardware-test.sh: line 26: jq: command not found
thread 'main' panicked at 'failed printing to stdout: Broken pipe (os error 32)', src/libstd/io/stdio.rs:805:9
note: run with `RUST_BACKTRACE=1` environment variable to display a backtrace
cp: cannot stat '/thumbv7em-none-eabihf/release/led': No such file or directory
# Try solving it
brew install jq
Warning: jq 1.6 is already installed and up-to-date
To reinstall 1.6, run `brew reinstall jq`
Oh wait, that error is coming from within the Docker image. Create an issue in the repository, add jq to the Dockerfile, build again, run, submit a pull request.
This got the code built successfully! Next step is to set up flashing the binary to the Teensy board.
# Install the loader cli from Homebrew
brew install teensy_loader_cli

# Try flashing the led.hex example binary
teensy_loader_cli --mcu=imxrt1062 out/led.hex
Unknown MCU type "imxrt1062"
Supported MCUs are:
 - at90usb162
 - atmega32u4
 - at90usb646
 - at90usb1286
 - mkl26z64
 - mk20dx128
 - mk20dx256
 - mk66fx1m0
 - mk64fx512
The version of teensy_loader_cli available on Homebrew doesn't have support for Teensy 4.0. Open an issue to the loader repository for creating a new release.
From previous experiences, setting up compiling C/C++ on macOS can be tedious, so not attempting to compile the cli from source this time. Let's install the graphical Teensyduino app. It requires the Arduino app, installing that first. Got the Teensyduino installed, run it, press upload to launch teensy loader. Open file, select led.hex, press upload. Press the button on the Teensy to get it to flashing mode. Re-plug the usb cable, and the example led Rust code is running on the Teensy. Success, got the led on! 💡
2020-04-13
Time to try to write some embedded Rust of my own. Maybe I should start with something simple: analog read the value from a potentiometer, use it to adjust led brightness with pulse-width modulation.
# Install the cargo subcommand `generate`
cargo install cargo-generate
# Use cargo generate to create my own project, with the provided teensy template
cargo generate --git https://github.com/mciantyre/teensy4-rs-template --name dimmer
Rust embedded has a common hardware abstraction layer. It is a collection of traits that can be implemented for various microcontrollers - kind of like a common API design for making embedded programming more coherent across devices. The documentation for embedded-hal tells me that an analog-to-digital conversion trait should exist: embedded_hal::adc::OneShot. Let's try that out!
Turns out, the adc traits are not implemented for the Teensy 4.0 yet. Time to open an issue. Maybe I could help with the implementation?
2020-04-25
Now, how does one contribute to the imxrt-rs repository, that houses the hal implementations for the Teensy?
cargo check
error: failed to read `/Users/walther/git/imxrt-rs/imxrt-ral/Cargo.toml`

Caused by:
  No such file or directory (os error 2)
Uh oh. Eventually, I figure some steps out and make a small pr for local dev instructions. This helps a bit:
cargo check
# output truncated for brevity
error: aborting due to 8324 previous errors

Some errors have detailed explanations: E0425, E0432, E0433.
For more information about an error, try `rustc --explain E0425`.
error: could not compile `imxrt-hal`.
8330 lines of errors.txt
Additionally, my editor's language server doesn't seem to understand most of the code. It doesn't provide sensible tooltips, or other helpers that I am accustomed to - and almost dependent on.

2020-04-29
Ask about editor integration in the GitHub thread.
Time to also simplify my goal. Maybe I should only have a simple switch as a digital input, controlling the led on/off?
Recently, I wiped and reinstalled my laptop for other reasons. Setting up the example code & building again. I need the ARM tools again.
Note from the future: at this point I had forgotten about the docker builder. Could've made things easier here!
brew cask install gcc-arm-embedded
./hardware-test.sh led
Time to fight with macOS Catalina security permissions. All the arm tooling executables are prevented from running, because they are "from an unknown developer". Found some tips in this thread: open the Security tab in System Preferences, run the script, press Allow for each individual component it blocks on, repeat until everything has been allowed and the script passes.
Then it was fairly easy to get a switch on the breadboard and digital read a pin!
extern crate panic_halt;

use bsp::rt::entry;
use teensy4_bsp as bsp;

use bsp::hal::gpio::IntoGpio;
use embedded_hal::digital::v2::InputPin;
use embedded_hal::digital::v2::OutputPin;

#[entry]
fn main() -> ! {
    let mut peripherals = bsp::Peripherals::take().unwrap();
    let switch = peripherals.pins.p0.into_gpio();
    let mut led = bsp::configure_led(&mut peripherals.gpr, peripherals.pins.p13);

    loop {
        match switch.is_high() {
            Ok(true) => {
                led.set_high().unwrap();
            }
            Ok(false) => {
                led.set_low().unwrap();
            }
            Err(_e) => (),
        }
    }
}
There's one issue though: for some reason, flipping the switch off doesn't seem to work. The pin doesn't reset on its own, only if deliberately pulling it straight to ground. Apparently I need to configure pullup/pulldown resistor - I had no idea (or recollection) that these are configurable. If I remember correctly, in some previous experiment with Teensy, the Arduino utilities just had a pinMode input and digitalRead - so any sort of pullup/pulldown was probably handled under the hood. And frankly, a software-configurable resistor feels super odd - how can you even make something conduct at a different rate without moving parts? 🤔
Trying to figure out how to configure the pullup/pulldown resistor proved to be a bit tricky.
use bsp::hal::iomuxc::pin_config::pull_up;
peripherals
  .pins
  .p0
  .set_pull_up(pull_up::Values::PullDown_100KOhm)
  .into_gpio();
// no method named `set_pull_up` found for struct `imxrt_hal::iomuxc::gpio::ad_b0::GPIO_AD_B0_03<imxrt_hal::iomuxc::Alt5>` in the current scope

peripherals
  .pins
  .p0
  .into_gpio()
  .set_pull_up(pull_up::Values::PullDown_100KOhm);
// no method named `set_pull_up` found for struct `imxrt_hal::gpio::GPIO1IO03<imxrt_hal::gpio::GPIO1, imxrt_hal::gpio::Input>` in the current scope
Slightly embarrassed, create a new issue, pondering whether the support exists or if there are any convenience methods provided somewhere that I missed.
2020-04-30
I got a reply that explains how to configure the pullup/pulldown resistor the right way! Thank you again for the help ❤️
With this, it was finally possible to get a switch to control the onboard led, without an external pullup/pulldown resistor. Yay!
#![no_std]
#![no_main]

extern crate panic_halt;

use bsp::rt::entry;
use teensy4_bsp as bsp;

use bsp::hal::gpio::IntoGpio;
use embedded_hal::digital::v2::InputPin;
use embedded_hal::digital::v2::OutputPin;

use bsp::hal::iomuxc::pin_config::{PinConfig, PullUp};

const SWITCH_PIN_CONIFG: PinConfig = PinConfig::with_none().set_pull_up(PullUp::PullUp_100KOhm);

#[entry]
fn main() -> ! {
    let mut peripherals = bsp::Peripherals::take().unwrap();
    peripherals.pins.p0.configure(&SWITCH_PIN_CONIFG);
    let switch = peripherals.pins.p0.into_gpio();
    let mut led = bsp::configure_led(&mut peripherals.gpr, peripherals.pins.p13);

    loop {
        match switch.is_high() {
            Ok(true) => {
                led.set_high().unwrap();
            }
            Ok(false) => {
                led.set_low().unwrap();
            }
            Err(_e) => (),
        }
    }
}
2020-05-14
Took a couple of photos for this blog post. Cleaning up the thoughts I wrote as a rudimentary markdown file with lots of bullet points, into an actual blog post that is readable. This all took a few hours (probably a couple too many).

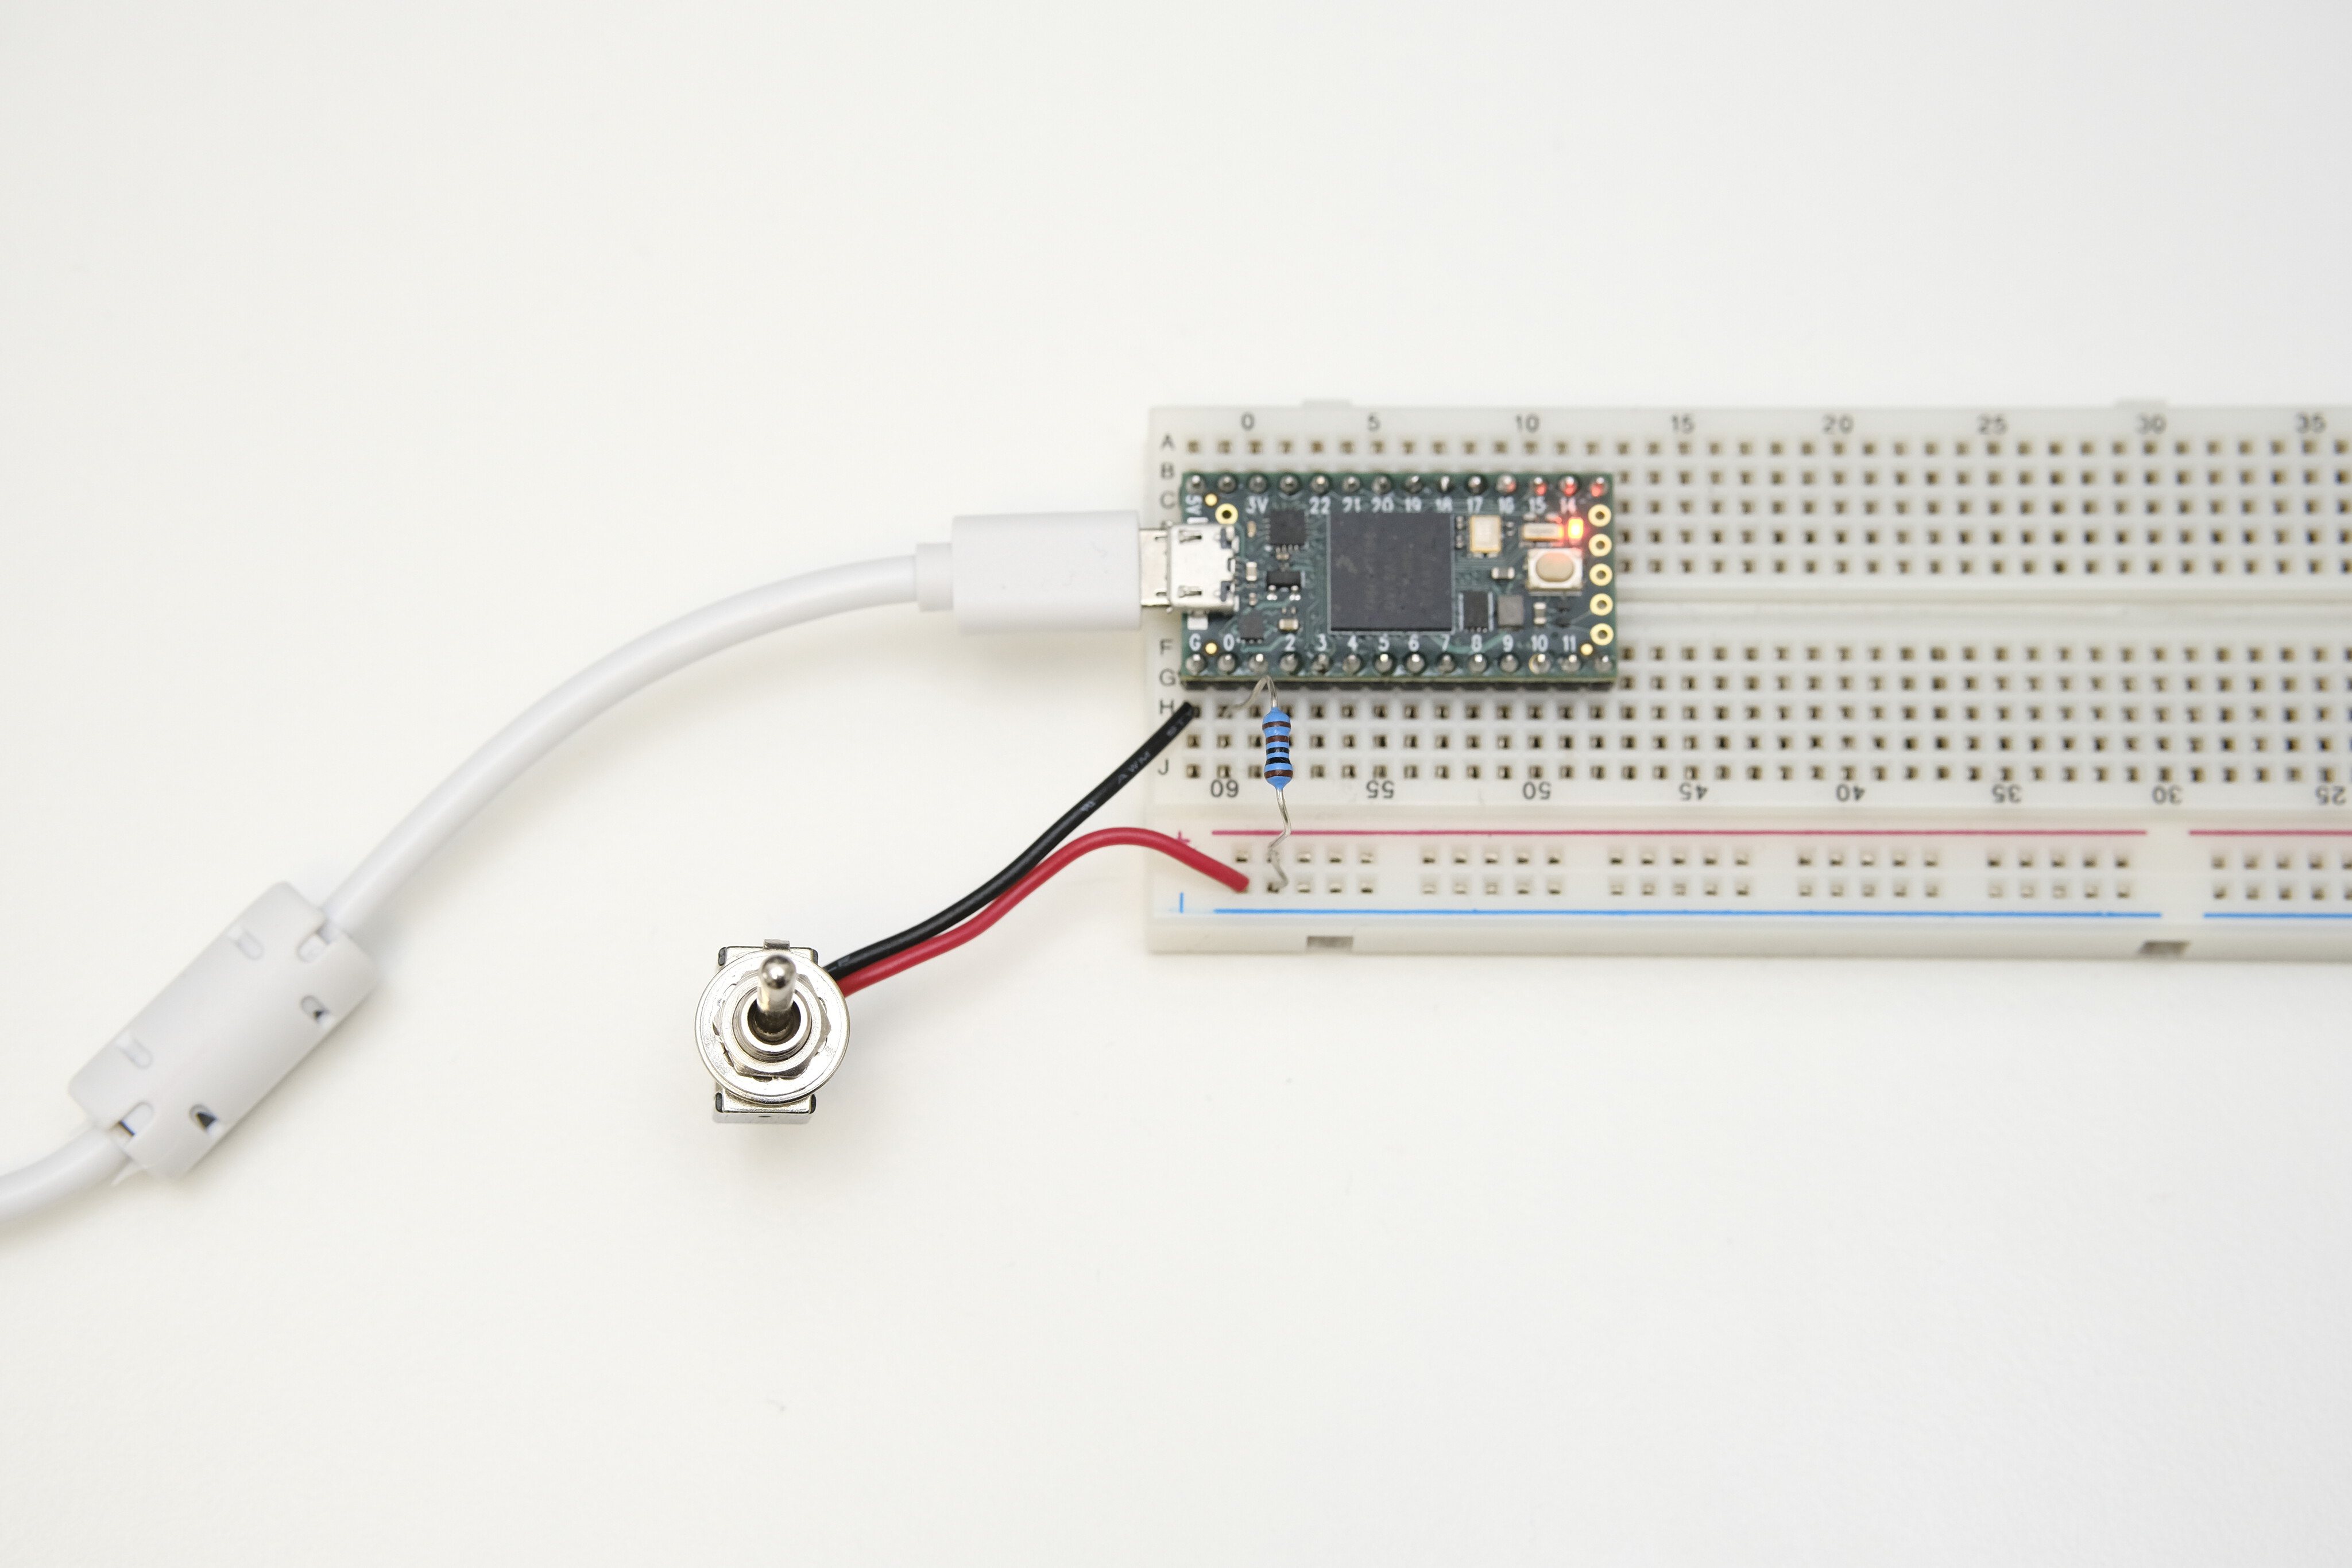
I now have a Teensy 4.0 on a breadboard, with a satisfyingly clicky metal SPST switch, that turns the onboard led on or off!
Massive thanks to bfrog and mciantyre for their hard work on the Teensy support crates, as well as their generous and patient help ❤️ The Rust community is so welcoming, helpful and wholesome. It is incredibly rewarding to be a part of it.
This has been a fun experience, but also occasionally a slightly frustrating one. However, I don't want these frustration points to be held against anyone or their work. None of this is specific to these devices, libraries, and languages. I just wanted to capture here the amount of tiny bumps in the road that software development in an unknown territory has. There are so many steps you need to take before you actually get the thing you really wanted to do, done.
The next step is probably going to be to try to get the ADC working, in order to get a potentiometer connected, for a controllable led dimmer example. After that, probably trying to do something with a digital-to-analog converter, DAC - maybe output some simple audio signals from the pins? The long-term thinking is that with both ADC and DAC working, and considering how much computational power the Teensy has, I could perhaps make a eurorack synth module some day soon 🎛🎵
Thank you for reading 🦀